Google Cloud CDN
Table of Contents
CDN is short of Content Delivery Network which is a network of servers distributed around the world with the primary purpose to deliver your content from more closer location to the end visitor. CDN is the most important factor for speeding your WordPress site regarding delivery speed.
Unlike others, we use enterprise one, Google Cloud CDN. With caches at more than 80 POP locations around the world, Google Cloud CDN is always close to your users. That means faster WordPress loads and increased engagement. And, unlike most CDN providers, your site gets a single IP address that works everywhere, combining global performance with easy management — no regional DNS required. Cedexis a well-known company for web traffic optimization, analytic, and benchmarks rated Google Cloud CDN as the fastest CDN provider, a well-known company for web traffic optimization, analytic, and benchmarks. You can read our story “Google Cloud CDN, the fastest content delivery network for WordPress“.

Every WordPress site hosted on our platform comes with built-in Google Cloud CDN, automatically enabled and configured during deployment, available for both production and staging sites. You can change the status as well as optimize your delivery settings in WP Admin->Closte->CDN tab.
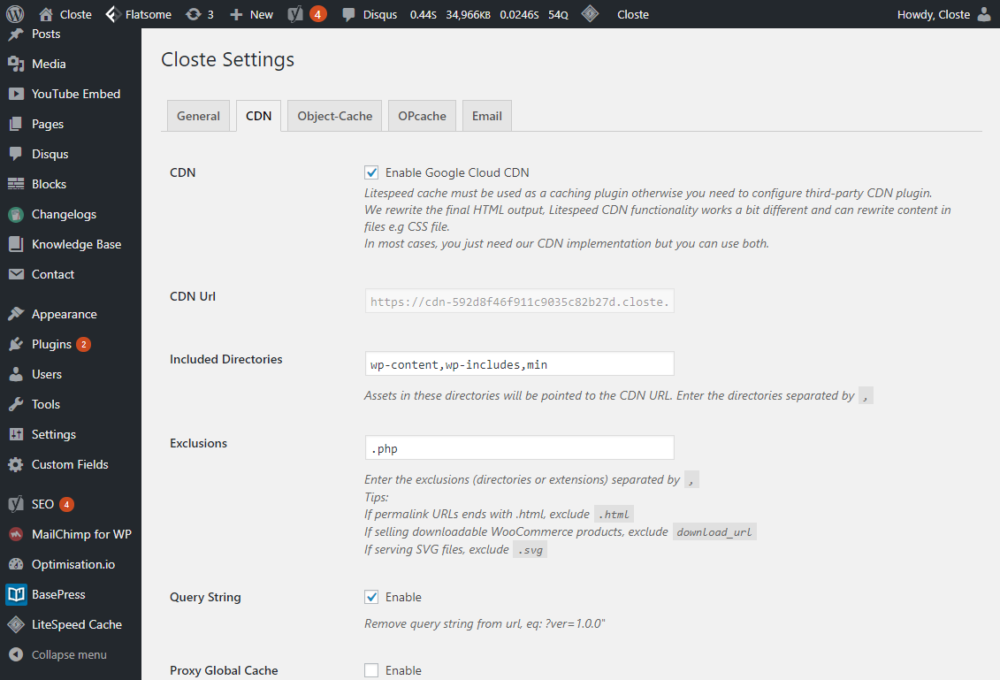
Exclusions field is one that usually you need to configure. Sometimes, depending on the WordPress site, our plugin can rewrite some links to use CDN that can cause issues. Known incompatibility are:
- Serving some .svg files – exclusion “.svg”
- Selling downloadable product using WooCommerce – exclusion “download_url”
We collect and visualize your Google Cloud CDN bandwidth usage per account and per WordPress site. You may notice that the last few hours do not include CDN bandwidth usage and usually, this delay is around 3 hours. Metrics are presented per region and each region has separated pricing. Metrics for the account usage can be found in the account dashboard, while metrics per WordPress site can be found in the site dashboard. To check the current month usage, go to Billing->Usage Report page or Site->Usage Report to see the per-site usage.

By default, our platform is configured to meet all requirements for Google Cloud CDN cache-ability. Closte is configured to cache all static resources for two days. You can overwrite any of these settings in a file called .htaccess in your WordPress root directory eq:
## EXPIRES CACHING ##
<IfModule mod_expires.c>
ExpiresActive On
ExpiresByType image/jpg "access 1 year"
ExpiresByType image/jpeg "access 1 month"
ExpiresDefault "access 1 month"
</IfModule>
## EXPIRES CACHING ##
For more information about cacheable content, visit official Google Cloud CDN documentation.
Purging Google Cloud CDN cache is a slow operation and we always recommend to disable the CDN feature in WordPress->Closte->CDN tab before clearing the cache, then purge the CDN cache and once the operation finished, re-enable the CDN. This is exactly what we are doing when we automatically update WordPress minor versions:
- Disable CDN
- Clear the cache
- Update WordPress
- Enable CDN
To purge entire cache from WordPress admin, go to WP Admin->Closte->CDN Invalidation.
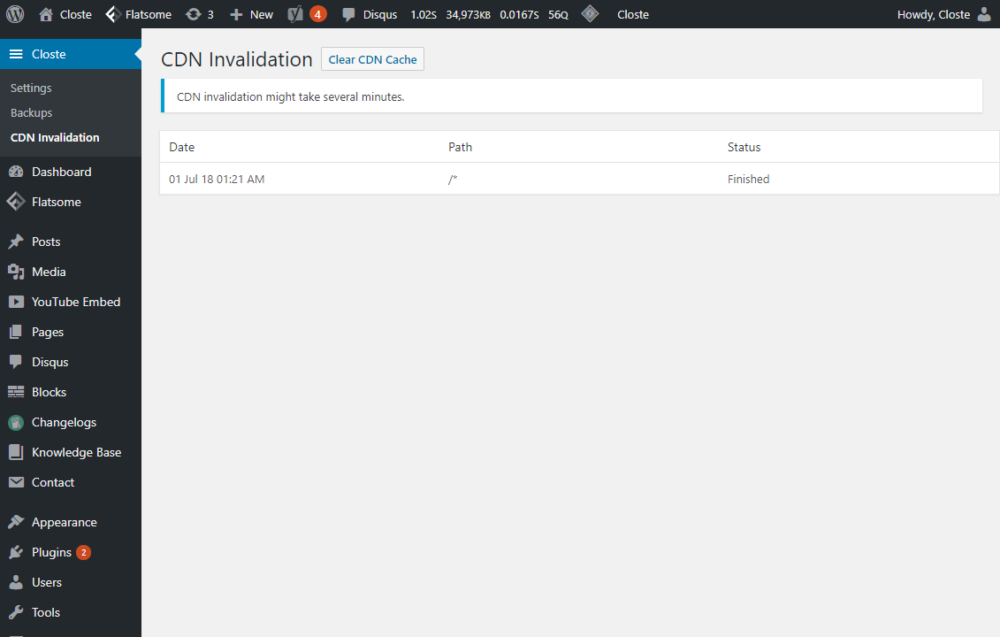
If you modify some WordPress files, but you can’t preview the changes because those files are already cached on Google Cloud CDN, you may want to purge the cache. Purging is billable, takes some time (1-10 minutes) and can be done in Site->Cache Invalidation. CDN path can be used to purge a single file, pattern or entire cache.
To purge single file:
/wp-content/themes/theme/style.css
To purge pattern:
/wp-content/*
To purge the entire cache:
/*
Custom CDN subdomain is an optional feature, billed $0.02 per hour. There are two main benefits of using a custom CDN subdomain, branding and the ability to serve all kinds of files e.g SVG files. To enable the custom CDN subdomain feature, go to Site->Domains page and edit the CDN domain. After that, you will need to make the required DNS changes and install an SSL certificate. Since our system is fully automated, just follow the requirements in the same Site->Domains page.
Important notes:
- We will clear the CDN cache when installing the SSL certificate for the first time.
- We will clear the CDN cache when updating the SSL certificate if the previously installed certificate expires in the next 24 hours.
- The custom CDN subdomain feature will be active on your website after installing the SSL certificate for the first time.
- Installing the SSL certificate for the first time is a very slow process, up to 30 minutes.
- If you are using the default CDN hostname in a third-party plugin e.g Litespeed cache CDN feature, you need to manually change the CDN subdomain.
To remove the custom CDN subdomain, just delete the CDN domain in Site->Domains page, our system will automatically revert to the default CDN hostname.
By default, our CDN URLs use rel=canonical HTTP header to tell search engines that these URLs are just used to speed up the delivery while for indexing they will still use the original URL. In most cases, this is how your WordPress website should work but if you need another structure, check the advanced canonical header and robots rules in Site->Settings->CDN tab.
For more information, check the following link: Consolidate duplicate URLs – Search Console Help.