Staging environment
Table of Contents
If you never used a staging environment, you are missing an amazingly powerful feature. To put it simply, a staging site is a clone of your live website, temporarily hosted on Closte subdomain. It enables you to test any changes or new features that you plan to implement in a secure environment. Developers often use staging sites as a testing ground in order to prevent errors occurring on ‘live’ websites and have the ability to push all changes to the production site with just one click.
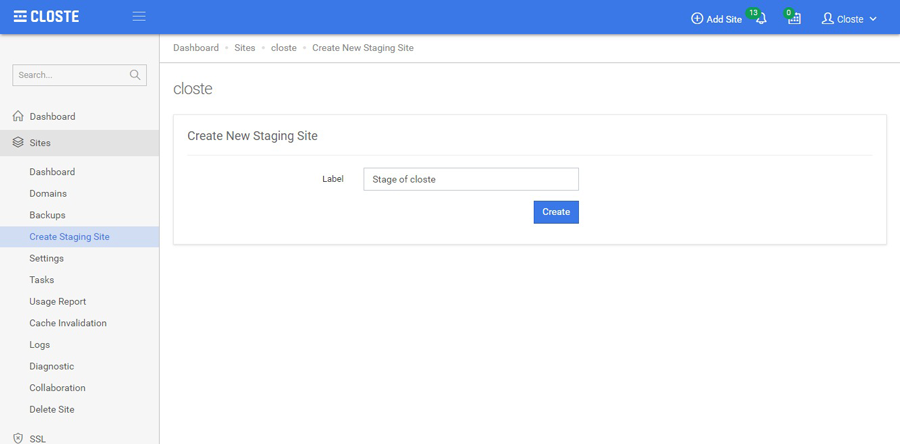
To create a new staging environment, go to Site -> Create New Staging Site and our system will automatically create everything for you.
The creating process is usually fast but depends on the size of your WordPress, it can take several minutes. A site with 1 million files needs around 30 minutes. Once the task is finished, your staging site will be visible on Sites page. Staging sites cannot be crawled by the search engines and additionally you have an option to password protect the site by enabling HTTP Basic Authorization in Site->Settings->Security tab.
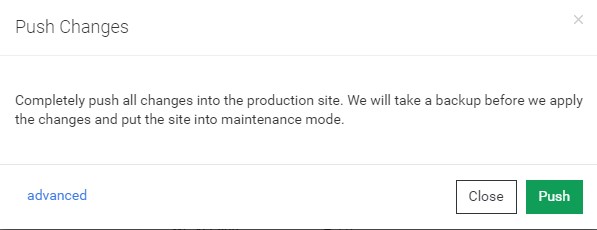
When you have finished with the changes and/or testing of new features and you wish to apply them to the live site, go to the staging site dashboard and click on the big blue Push changes into production site button.
Please read our safety tips before pushing the changes to the production site. This process firstly will make a backup of the production site, put the maintenance mode on and will copy all changed/new files and will completely overwrite the database.
Before pushing the changes to the production site, you always must answer yourself one question: What can I lose on the production site if I push all the changes. If the production site has some new content after the staging site was made (like new WooCommerce order, user, comment, post, page and similar), the push process will overwrite the production database and you will lose the newly entities. This is why sometimes the staging environment can only be used for a testing purpose.
The main purpose of staging environment is to eliminate all well-known problems when working with WordPress. WordPress itself is pretty much stable software, but a WordPress site has tons of other plugins and themes developed by totally different developers and upgrading or changing some configurations may produce errors on your site.
Here are some use cases we recommend:
Sometimes with the activation of a new plugin, your site may not work properly, and very often this error is called WordPress White Screen of Death (WSOD). To fix this error, you need to delete the plugin manually and hope that everything will be as before. If this happens to you on your WordPress staging environment, you just need to recreate it, and that won’t affect your production site.
Some plugins can make massive changes on your site; furthermore, you’ve surely noticed that they strongly recommend you to make a “backup” before testing. The risk can be so high that you can lose all the images, for example, when using a plugin for deleting all the unnecessary images from the disc that are not used in WordPress Media. There is another type of plugins testing, typically they add or modify the visuals of your site, such as the social sharing plugin or image slider. While testing this kind of plugins, there is no need showing our visitors something that we just want to see how it works and afterward configure config parameters and finally, make a decision whether to use it. When you use WordPress staging environment, all of these tests are made on your cloned site, and if everything is correct, with a single click, you can push the changes to your production site.
Very often, we encounter problems when we are upgrading a major version of a plugin, e.g. from 1.1 to 2.0 version. Sometimes, even if we have no problems with itself plugin update, other plugins are closely related to it. For example, when we would try to update WooCommerce from 2.6 to 3.0, it is possible to have no problem with the WooCommerce, but with the payment or order processing plugins related to WooCommerce.
Another example is the connection of the theme with the plugins; usually, the new versions of the plugins are created first and afterward, the developers make their themes compatible with the new versions of the plugins. Check Flatsome, one of the best-selling WooCommerce themes, on the right side you can find compatibility information.
By using a staging environment, all these plugin updates will be done on the same cloned site, and if the theme and the other plugins are compatible, you will afterward push the changes to your production site.
How many times didn’t you make an update to the major version of the WordPress (e.g. 3.8 to 4.0) because you were not sure whether the theme and the other plugins were compatible with the new version of WordPress? If updating your WordPress site was so stable and comfortable, the “Auto WordPress Major Update” would be an active default option by now.
Can you imagine now, how easy and stressless is the testing on the staging environment. You simply make the update on your cloned site and later, after you make sure that everything is working and compatible, with only a click the changes are reflected on your production site.
You can change a theme with a single click, but afterward, depending on the theme features, you will need several hours to set all the parameters. This process can take quite a lot of time, and that’s why you do not want to make your production site look like a development site because you already have active visitors. It is unpleasant, I know, and that’s why you need to modify, test the new theme and everything else in the staging environment and after everything is set correctly, push the changes to your production site.
If you make changes to a CSS, JS file or image that always have the same URL and you use CDN; you have two ways to review the new changes, temporarily disabling the CDN or deleting the CDN cache with every change. Both ways would have an adverse effect on the performance of your site.
The same goes for Full Page caching, very often you need to empty the cache to be able to see the new changes. This could have an adverse effect that would dramatically slow down your site.
Rare are the developers that test a new version of PHP before changing it. Since each plugin is made by a different developer, which means that each plugin owns a different level of quality and compatibility, it is always wise to test the new PHP version before changing it on the production site.
By coding a custom code, you, in fact, go through a testing process. Sometimes the errors can be huge and thus you can come up to the well-known “WordPress White Screen of Death” error. We understand the need that you shall develop your code on the current state of your site, but the risk is high. Now imagine doing the same on another site exactly same as your production site and when everything is ready and tested, to push all those changes to the production site.
You have own use case when to use the staging environment?
Before creating a staging environment be sure to meet our requirements:
- The production site must be a working WordPress site when creating or pushing the changes.
- The staging site must be a working WordPress site when pushing the changes.
- Staging site must not be larger than 10GB.
When we create a staging environment, we follow the site stage rules found in Site -> Settings -> Staging tab. Default rules are:
- .* # Exclude all hidden files and folders
+ */ # Include all folders - Search in all folders
+ *  # Include all files
If the site has more then 10GB content, modify the staging settings to exclude some or all uploads while including the accessed files from last 7 days. Example rules excluding all uploads but including all accessed files in last 7 days by checking Include Last 7 Days Accessed Files option.
- .*
- wp-content/uploads/
+ */
+ *
Take a note, the order is very important but you can change the order as the values are draggable.
Here are some general tips to review the site after the create or push process.
- Not all URLs in the database can be replaced e.g Slider Revolution images.
- Development mode is always enabled on the staging site and always disabled on the production site after the push process.
- The push process does not clear the CDN cache on the production site. If the site still loads some old CSS, JS, image or similar file, temporary disable it, flush the CDN cache and after that enable it again.
- Staging sites cannot be crawled by the robots. Requesting /robots.txt URL on a staging site will always respond with disallowed rules regardless of your real robots.txt rules.
- You can completely protect a staging site by enabling HTTP Basic Authorization in Site->Settings->Security tab.
- You can route all emails on the staging site to a custom email address in WP->Closte->Email Tab->Development Mode field.
- We do not replace any absolute paths in other files or database and developers should avoid using absolute paths, instead use relative paths.
If you create a staging site for a multisite WordPress type, we replace the database only for primary site, all other sites still have the old URLs and settings. If you want to be able to view another multisite site, you will need to manually update the database with some own temporary domain but you must revert the process before pushing the changes into the production site.
A backup from the production site is always taken before pushing the changes, so if you lose some important entities you have the ability to restore the previous state of the production site.

